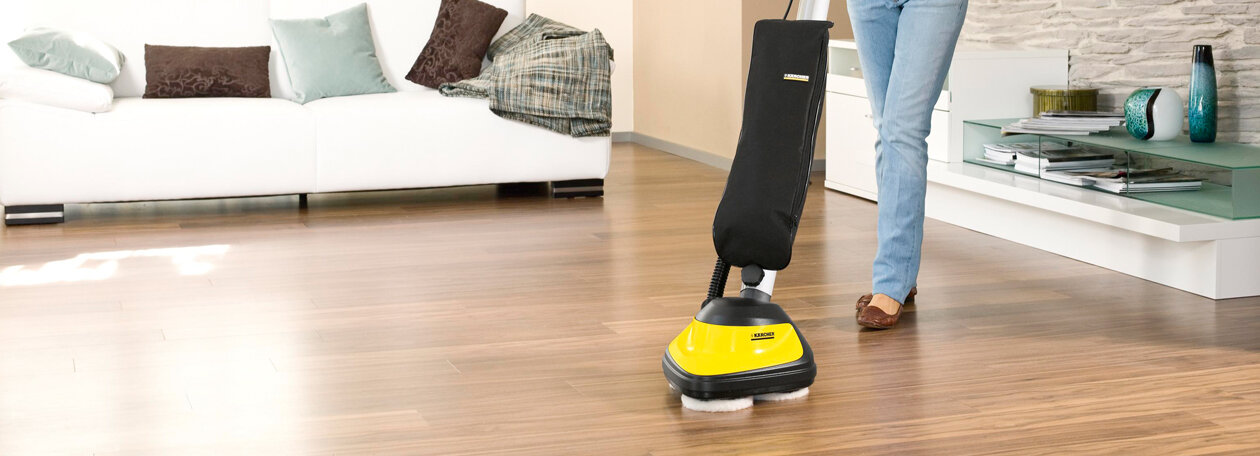
There’s just something magnificent about the rich, warm gleam of polished wooden floorboards.
They add character and beauty to any home, transforming ordinary spaces into cosy, inviting places. However, maintaining this natural beauty requires some know-how and effort.
Polishing wooden floorboards not only enhances their appearance but also protects them from wear and tear.
Whether you’re looking to refresh an old floor or simply maintain the shine of a newer one, this guide will equip you with practical tips and when you should get help from experienced timber floor polishers Melbourne to achieve dazzling results.
Let’s dive into the best practices for polishing and maintaining your wooden floorboards to keep them in top-notch condition.
Preparing the Wooden Floorboards
Maintaining the lustrous appearance of wooden floorboards not only boosts the overall aesthetic of your home but also preserves the integrity of the wood.
The preparation stage is critical as it sets the foundation for an optimal polishing process.
Clearing the Room
Start by removing all the furniture and rugs from the room. This facilitates unrestricted access to the entire flooring surface, ensuring that no spots are missed during the cleaning and polishing process.
If furniture is too heavy, consider using furniture sliders to protect both your floor and your back. Also, sweep or vacuum up any loose dirt and debris that might scratch the wood in the subsequent steps.
Cleaning the Floorboards
Next, thoroughly clean the floorboards. Begin with vacuuming or dry mopping to eliminate any lingering dust particles. Once the surface dirt is removed, wash the floors with a wood cleaner that’s appropriate for your type of floor finish.
Be wary of using excess water or harsh chemicals, as these can damage the wood. Instead, use a damp mop or a cloth and wipe over the floorboards gently.
Allow the floorboards to dry completely before moving on to polishing. This prevents moisture from being trapped under polish, which could lead to wood damage.
Choosing the Right Polishing Products
The selection of suitable polishing products and tools is crucial not only for achieving that perfect shine but also for protecting the wood in the long term.
It’s essential to choose products that are compatible with the type of wood and finish of your floorboards.
Types of Floorboard Polish
There are various floorboard polishes available, each suited for different types of wood and finishes. These can be broadly categorised into wax-based, oil-based, and water-based polishes.
– Wax-based polishes provide a hard finish and a rich colour, making them suitable for antique and traditional wooden floors.
– Oil-based polishes soak into the wood and enhance its natural beauty. They offer durability and protection, though they may require more frequent re-application compared to other types.
– Water-based polishes are less scented, dry faster, and don’t yellow over time, making them a popular choice for contemporary homes.
Always test the polish on a small, inconspicuous area of your floor to ensure it gives the desired finish and does not damage the wood.
Tools for Polishing
The right tools can make the polishing process easier and more effective. The most commonly used tools include:
– Polishing Pads or Brushes: These are used to apply and buff polish evenly. Brushes with soft bristles are ideal to avoid scratching the wood.
– Buffing Machines: For large areas, a buffing machine can save time and effort. They distribute polish evenly and buff it to shine efficiently.
– Microfiber Cloths: These cloths are great for applying a final touch-up by hand, particularly in small spaces or corners where machines can’t reach.
Ensure that all tools are clean before use to avoid transferring dirt onto your freshly cleaned floors.
Safety Precautions
Finally, it’s important to keep safety in mind while polishing your floorboards:
– Ventilation: Ensure the room is well-ventilated. Many polishes contain volatile organic compounds (VOCs) that can be harmful when inhaled.
– Protective Gear: Wear gloves and masks to avoid direct contact with chemicals, especially if you are using solvent-based polishes.
– Careful Handling: Read instructions carefully and handle all products according to manufacturer guidelines to prevent accidents.
By carefully clearing your space, choosing the right products, and taking necessary precautions, you’ll enhance the longevity and beauty of your wooden floorboards.
Armed with these insights, your floors will not only shine but also reflect the care and effort you put into maintaining the heart of your home.

Step-by-Step Polishing Process
Filling in Gaps and Cracks
Before you begin the actual polishing, it’s crucial to prepare your wooden floorboards by addressing any gaps and cracks.
This step is crucial because it ensures a smooth, even surface, which is key for a perfect finish. Begin by meticulously cleaning the area to eliminate all dust and debris. Then, use a putty knife and wood filler to fill any gaps and cracks.
Choose a filler that closely matches the colour of your wood to maintain a cohesive look. Allow the filler to dry completely, which might take a few hours, depending on the product instructions. Once dried, gently sand over the filled areas to create a smooth, level surface with the rest of the floor.
Sanding the Floorboards
Sanding is perhaps the most labour-intensive part of the floor polishing process, but it’s also one of the most rewarding. It removes the old finish, evens out the surface, and prepares the wood for the new polish. Start with a coarse-grit sandpaper to remove the old layers of polish and any imperfections.
Gradually move to a finer grit sandpaper to smooth out the surface. Always sand following the direction of the wood grain to avoid scratches that could mar the appearance of the floorboards.
Ensure that the entire floor is uniformly sanded before moving on to the next step. Remember to clean up all the dust after sanding, as leftover particles can interfere with the polishing process.
Applying the Polish
Once your floorboards are smooth and clean, it’s time to apply the polish. Select a polish that is suitable for the type of wood of your floorboards and the desired finish (glossy or matte). Apply the polish using a soft cloth or a mop, working in small sections.
Spread it evenly along the grain of the wood, making sure not to leave any puddles or thick spots. It’s important to work in a well-ventilated area as some polishes contain strong fumes.
Allow the polish to dry according to the manufacturer’s instructions on packaging; this typically takes at least 24 hours. During this time, keep the room free from foot traffic.
Buffing for Shine
After the polish has dried, the next step is to buff the floorboards to bring out a lustrous shine. You can use a buffing machine or do it manually with a buffing pad.
If you’re using a machine, gently glide it over the floor in smooth, circular motions; this process enhances the shine and helps in setting the polish.
If you’re buffing by hand, use a soft cloth or buffing pad and apply pressure in circular motions. This step not only increases the aesthetic appeal of the floors but also adds an extra layer of protection.
When to Hire a Professional Floor Polisher
Complexity of the Floor Finish
Sometimes, the finish of your wooden floorboards might require more intricate care than a simple DIY polish floorboard job can provide. This is particularly true if you’re dealing with antique or hand-scraped wood. Professional floorboard polishers Melbourne understands the nuances of different finishes. They can often achieve better results without damaging the wood.
Lack of Proper Equipment
Professional floor polishing requires specific tools and equipment like industrial-grade sanders and buffers that most homeowners do not possess. Renting this equipment can be costly, and improper use can quickly lead to damaged floors. Hiring a professional polisher ensures that the right tools are used efficiently and safely.
Existing Damage and Restoration Needs
If your wooden floorboards are significantly damaged or need extensive restoration, a DIY polish floorboard approach might not be sufficient. Professionals can assess the structural integrity of the floor, make necessary repairs, and ensure that the polishing brings out the best in the old wood without causing further damage.
Size and Scale of the Area
Larger rooms or multiple areas can be overwhelming and physically demanding to polish by hand or with small, domestic equipment. Professionals can handle large-scale jobs more quickly and with a uniform finish across all areas. They are equipped to manage the logistics and labour, saving you time and ensuring the end result is both beautiful and uniform.
Final Polish Note
Polishing your wooden floorboards is more than just a routine task; it’s a way to enhance the beauty and extend the durability of your home.
From choosing the right polish to mastering the technique of applying it evenly, every step you take contributes to a more vibrant and protected floor.
Remember, regular maintenance doesn’t only enhance the appearance of your floors—it also preserves their strength and character over time.
So, gear up with your polisher or cloth, embrace the process, and watch as your wooden floors continue to make a statement in your home for years to come.
If you’re unsure about handling the complexities yourself, consider hiring floorboard polishers Melbourne experts from Prestige Floors. We offer expert polishing services that ensure your floor’s beauty and durability are expertly preserved.
Contact us today and step into a more beautiful home!
