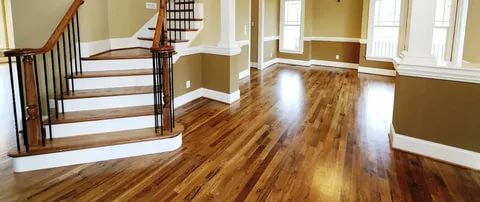
Timber floors are a beautiful addition to any home. They’re durable, they look great and they’re easy to maintain. However, timber floors can be damaged over time by scratching or fading. To restore them to their former glory, you need Timber Floor Sanding and Polishing Melbourne. Here’s everything you need to know about this process:
What Is Timber Floor Sanding?
Sanding and polishing timber floors are not just about making the floor look nice. It’s a way to restore the original beauty of your timber floors, by removing any dirt and grime that can cause scratches or stains. Sanding and polishing also make it easier to clean your floor in the future, as well as protect it from moisture damage.
This can be done on its own or with more intensive renovations like stripping and waxing. The Floor Sanding Melbourne process works by removing the top layer to expose fresh timber underneath. You then seal it with a high-quality finish, which protects against wear and tear.
Equipment Needed For the Job
For this job, you’ll need a sander and polisher for the floor and equipment to remove the dust. You will also be using a vacuum cleaner, sanding pad, and disc, as well as a polishing pad and disc.
Sanding and polishing timber floors is a big job, but it doesn’t have to be daunting. Follow these steps, and you’ll have a beautifully polished floor in no time!
- Prepare the room: You will need to remove everything from the floor before sanding can begin. This should include furniture, rugs, and mats. Furniture that cannot be moved easily should be covered with dustsheets or plastic sheeting. If you are using any additional protection for your floorboards (such as felt pads or casters), take care of those now as well; alternatively, remove them before starting this process if possible, as they will only get in your way during sanding and polishing activities later on.
- Prepare your timber: The timber needs to be cleaned before beginning any work with sandpaper—this will not only make it easier for you to see where you’re going but also ensure that no dirt remains on its surface after finishing off! To clean your boards properly use warm water mixed with white vinegar applied with a damp sponge; scrubbing gently in one direction will help loosen any remaining dirt particles so they can be washed away easily once rinsed off thoroughly afterward.*
Floor Sander Hire
If you don’t have a floor sander and need to hire one, there are a few options. You can:
- Rent it from the store where you bought your timber. The local hardware store may have a rental service available for their customers. This is often much cheaper than hiring one yourself, but be sure they’re not going to charge extra for delivery if they don’t deliver to your home or business address! You could even rent the machine and drive it over yourself if that’s an option too!
- Hire a professional floor sanding company that will come out on-site and do all of the hard work for you! Make sure to ask about any additional fees before signing anything though – some companies offer free delivery within certain areas only, or may charge extra for travel expenses outside those boundaries; others include other services such as cleaning afterward (which we recommend anyway).
Common Questions about Timber Floor Sanding
- What is the best kind of floor sanding machine to use?
- What is the best kind of floor sanding pad to use?
- What is the best kind of floor sanding dust?
- How do I know when to sand a timber floor?
Sanding and polishing are the last steps in the timber flooring process, but they’re also some of the most important. A beautifully polished floor will complement your home and make you proud of your investment for years to come.
Don’t be intimidated by this step-by-step guide to sanding and polishing timber floors—we explain everything you need to know about how to make your floors shine like new!
Conclusion
And that’s it! You’ve now learned how to Timber Floor Sanding and Polishing Melbourne in preparation for finishing. This process isn’t hard at all but it does require some time and patience. We hope that this guide has given you the confidence to get started on your own timber floor project, whether it be repairing damage or putting down fresh coats of finish!

